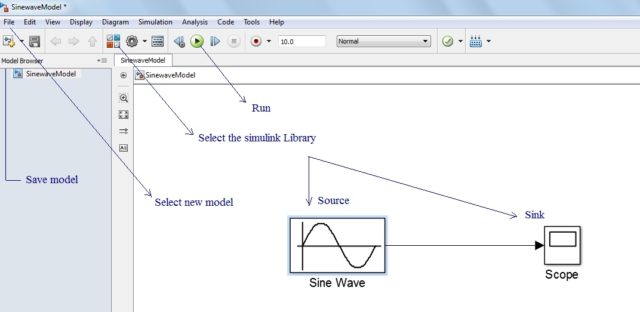
At the end of this post, you will learn to run a Simulink model in your MATLAB software. Hope you have Matlab installed on your system. Now follow the step by step procedure to run your first Simulink model.
1. After Installation and Setup
On my system, I have installed and set up MATLAB version R2013a. Open MATLAB software and then click on the Simulink library (which is located at the top).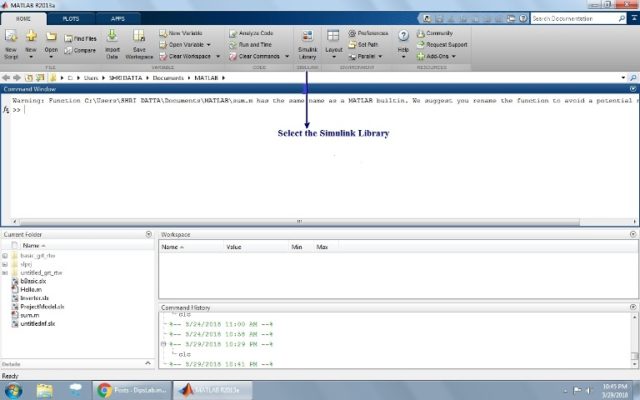
 2. Introduction of Simulink libraries
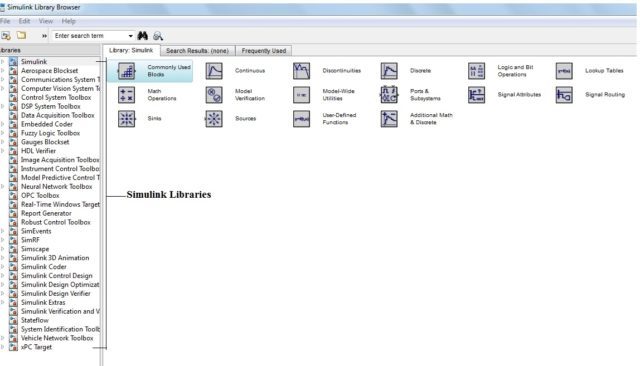
Simulink library is the collection of the variety of electrical toolbox, source, equipment, load, systems, panel, scope, etc… We need them to build our model.

3. Creating a New Model
Now actual work begins. Select new model from the file in Simulink library browser (located in the left sidebar). Here, you need to choose components as per your requirements to build your model.4. Stateflow of Model
To build a model, you can simply drag and drop the component in the new model. And connect them. Click on the Run button. You will be notified if there are any errors in your model. Otherwise, everything is fine with your model. For Example, The considering Sinewave Model.